
Raspberry Pi Access: Remote Access Guide & Tips
Can you truly harness the power of your Raspberry Pi from anywhere in the world? The answer, remarkably, is yes, and unlocking this capability opens up a universe of possibilities, from remote file access to sophisticated home automation.
The allure of remote access to your Raspberry Pi is undeniable. Imagine monitoring your home security system from a thousand miles away, or remotely managing a project that requires constant oversight. It's the kind of capability that once seemed the domain of tech giants, now readily available to anyone with a small, affordable computer and a little know-how. The journey to achieving this, however, often presents a few hurdles. The complexities of network configurations, the security concerns of exposing your home network, and the sheer variety of methods available can be daunting, leaving many enthusiasts lost in a sea of technical jargon.
The good news is that accessing your Raspberry Pi from outside your local network isnt the exclusive domain of network engineers. In fact, it's achievable with a variety of techniques, each with its own set of advantages and drawbacks. This article will delve into several of the most common and effective methods, providing you with the knowledge and tools you need to take control of your Raspberry Pi, no matter where you are.
- Channing Tatums Parents Meet Kay Glenn Tatum
- Exploring Quantrill Barnum Family History Caroline Cornelia
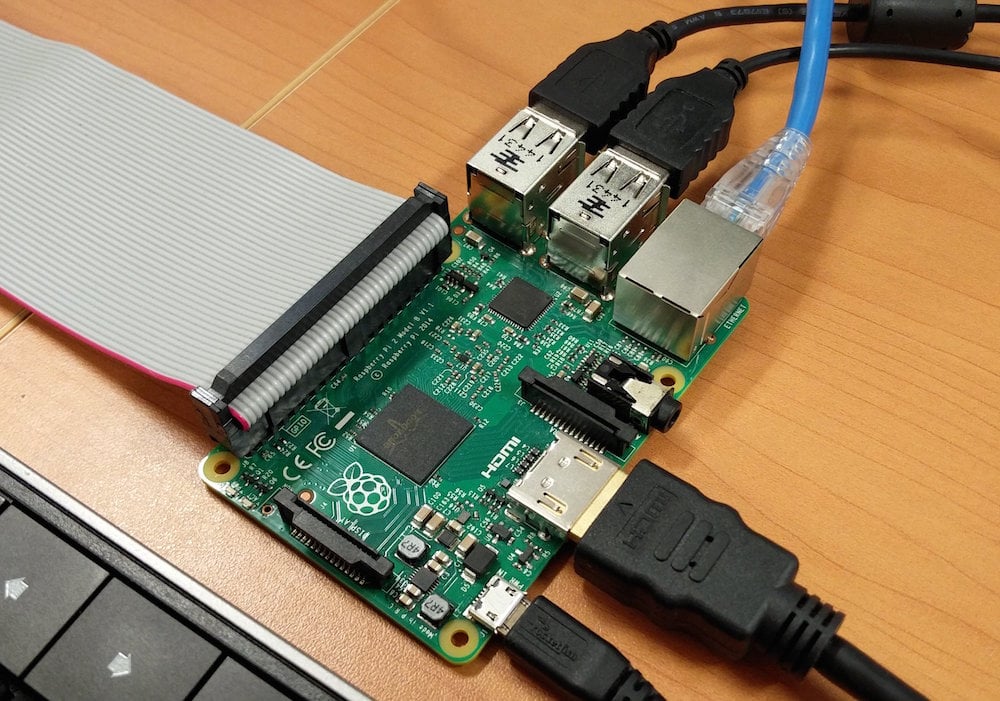
Before we dive into the specifics, it's crucial to understand the fundamental components involved. A Raspberry Pi, obviously, is the centerpiece. Depending on your needs, a Raspberry Pi 3B+ or 4 is recommended, with the latter offering more processing power and memory. Beyond the Pi itself, you'll also need an external hard drive, preferably an SSD for faster read/write speeds, especially if you're building a Network Attached Storage (NAS) server.
Many users are familiar with setting up a web server on a Raspberry Pi to learn HTML or use picast. SSH (Secure Shell) also needs to be configured correctly for accessing your Pi from outside your network. You might want to access a camera stream from outside your local Wi-Fi network. All these use cases require different network settings.
Here's a summary of the main components and technologies:
- Amber Stevens West Latest News Updates You Need To Know
- Bert Convys Spouses Anne Anderson Catherine Hall Relationships Explored
| Component/Technology | Description |
|---|---|
| Raspberry Pi | A small, single-board computer that serves as the foundation for your remote access setup. |
| External Hard Drive (SSD recommended) | Essential for storing data if you're setting up a NAS server or other storage-intensive applications. |
| Router | The device that connects your home network to the internet. It plays a crucial role in port forwarding. |
| Port Forwarding | A technique used to direct incoming network traffic from the internet to a specific device (your Raspberry Pi) on your local network. |
| VPN (Virtual Private Network) | A secure connection that allows you to create a private network over a public network, encrypting your traffic and providing an extra layer of security. |
| Dynamic DNS (DDNS) | A service that provides a consistent domain name for your home network, even if your public IP address changes. |
| SSH (Secure Shell) | A secure protocol for remotely accessing and managing your Raspberry Pi's command-line interface. |
| VNC (Virtual Network Computing) | A system that allows you to remotely access your Raspberry Pi's graphical user interface. |
Reference: Raspberry Pi Official Website
Method 1: Port Forwarding
One of the most common methods involves configuring port forwarding on your router. This is the process of directing incoming network traffic from the internet to a specific device on your local network in this case, your Raspberry Pi. Its a crucial step, but it also requires some careful configuration. To get started, you'll need to access your router's admin panel. This is typically done by entering your router's IP address in a web browser (e.g., 192.168.1.1 or 192.168.0.1). You'll then need to locate the 'port forwarding' section, which may be labeled differently depending on your router's make and model.
In this section, you'll add a new rule to forward an external port (e.g., 2222) to the internal IP address of your Raspberry Pi and port 22 (SSH). This configuration tells your router to forward all incoming traffic on the external port to the specified internal IP and port. Make sure to configure a static IP address for your Raspberry Pi to ensure the port forwarding rule always directs traffic to the correct device. While port forwarding is a powerful technique, it does have security implications. By opening ports on your router, you're essentially creating entry points into your network. This is why it's crucial to choose strong passwords and keep your Raspberry Pi's software up-to-date to patch any security vulnerabilities.
Method 2: VPN (Virtual Private Network)
A VPN offers a more secure approach to remote access. A VPN creates an encrypted connection between your device and your home network. This means that all data transmitted between your device and your Raspberry Pi is protected from eavesdropping. Setting up a VPN involves configuring a VPN server, which can be done on your Raspberry Pi. You then connect to this server from anywhere in the world using a VPN client. This effectively creates a secure tunnel through the internet, allowing you to access your home network as if you were physically present. Setting up a VPN involves configuring VPN server software (such as OpenVPN or WireGuard) on your Raspberry Pi and configuring your router to forward the VPN traffic to your Pi.
The Pi on your network then establishes a VPN connection to that server. You can then connect to that server from anywhere with your VPN client and (if all is set up correctly) you'll be connected to your home network. You can also set up a VPN on a VPS (Virtual Private Server), which offers some advantages. For example, you can then connect to that server from anywhere with your VPN client and (if all is set up correctly) you'll be connected to your home network. This can simplify things, especially if your home internet connection has a dynamic IP address, which changes periodically. However, it does require some additional cost as you will need to subscribe to a VPS provider.
If you have a VPS you could also set up a VPN, although if from my office means using the office computer then that's a little iffier. But if it is just your own laptop\/smartphone\/whatever you want to use, you put a VPN server on the VPS, have the pi configured to stay connected all the time, and use a VPN client from the whatever device.
Method 3: Dynamic DNS (DDNS)
This is the situation: you've set up port forwarding or a VPN, but your home's public IP address changes frequently. This is where Dynamic DNS (DDNS) services come in. These services provide a consistent domain name for your home network, even if your public IP address changes. When your IP address changes, your router automatically updates the DDNS service, ensuring that you can always connect to your home network using a memorable domain name (e.g., myhome.example.com) rather than a constantly changing IP address. There are many DDNS providers, and most routers support integrating with them. Popular choices include DuckDNS and No-IP. Using a DDNS service is a key component for a smooth remote access experience.
Method 4: Ngrok and Other Tunneling Services
Tools like Ngrok offer a simpler approach to accessing your Raspberry Pi from outside your local network. Ngrok creates a secure tunnel to your Raspberry Pi, bypassing the need for complex router configurations. This method requires very little setup, just a few commands in the terminal, and works very reliably. You simply install the Ngrok client on your Raspberry Pi and run a command that creates a tunnel to a specific port (e.g., port 22 for SSH). Ngrok then provides you with a public URL that you can use to access your Raspberry Pi from anywhere, even behind NAT (Network Address Translation). Ngrok can also be used to access web servers running on the Raspberry Pi.
There's no firewall or router reconfiguration, and you don't need to know the IP address of your Raspberry Pi, or provide a static one. Other similar services offer alternative options, each with its own strengths. These services often come with a free tier with limitations, and paid tiers with more features like custom domain names and more concurrent connections.
SocketXP provides a simple, secure, and easy way to access your home Raspberry Pi from the outside network. SocketXP doesn't require you to hack any settings in your Wi-Fi router. It works out of the box.
Security Considerations
Regardless of the method you choose, security should be your top priority. There are security implications of SSH and other remote access protocols, and how to protect your Raspberry Pi from unauthorized access. Here are some key security practices to keep in mind:
- Strong Passwords: Always use strong, unique passwords for your Raspberry Pi and all associated accounts. Avoid using default passwords.
- SSH Key Authentication: Enable SSH key authentication to avoid password-based logins altogether. This is a more secure method.
- Firewall: Enable a firewall on your Raspberry Pi to restrict network access to only necessary ports and services.
- Keep Software Updated: Regularly update your Raspberry Pi's operating system and all installed software to patch security vulnerabilities.
- Monitor Logs: Monitor your system logs for any suspicious activity or failed login attempts.
- Two-Factor Authentication (2FA): If possible, enable two-factor authentication for added security.
These precautions are crucial to safeguard your Raspberry Pi and your home network from potential security threats. When you access your Raspberry Pi from outside your local network, you're exposing it to the broader internet. This means you must be vigilant about security.
Putting It All Together: A Practical Example
Let's consider a practical scenario: You want to access your Raspberry Pi's command-line interface (CLI) using SSH from your smartphone while you're away from home. Here's how you might approach it, combining some of the techniques we've discussed:
- Assign a Static IP: Configure a static IP address for your Raspberry Pi on your local network (e.g., 192.168.1.100). This will help with port forwarding.
- Port Forwarding: Access your router's admin panel and set up port forwarding. Forward an external port (e.g., 2222) to your Raspberry Pi's internal IP address (192.168.1.100) on port 22 (SSH).
- Dynamic DNS: Sign up for a Dynamic DNS service and configure your router to update your domain name with your current public IP address.
- SSH Client: Install an SSH client on your smartphone (e.g., Termius, JuiceSSH).
- Connect: Open your SSH client and connect to your Raspberry Pi using your DDNS domain name and the external port you configured (e.g., myhome.example.com:2222).
Once you have a working setup, you can then connect to that server from anywhere with your VPN client and (if all is set up correctly) you'll be connected to your home network.
Advanced Use Cases
The possibilities expand far beyond simple SSH access. Once you have the infrastructure in place, you can start to explore a range of advanced applications.
- Network Attached Storage (NAS): Build a NAS server using your Raspberry Pi and an external hard drive.
- Media Server: Set up a media server to stream your movies, music, and photos to your devices from anywhere.
- Home Automation: Control your smart home devices remotely.
- Web Server: Host your own website or web applications on your Raspberry Pi.
- Remote Monitoring: Monitor the performance of your Pi, access files, or run programs.
To set up a NAS server with a Raspberry Pi and access it from outside the network, consider the following steps:
- Install an Operating System on Raspberry Pi.
- Connect an External Hard Drive.
- Install and Configure a NAS software like OpenMediaVault.
- Configure Remote Access (using port forwarding, VPN, or Ngrok).
- Access from Outside your Network.
These are only a few examples, the only limit is your imagination. The key is to understand the basic principles and security aspects of remote access. You can connect to your Raspberry Pi from outside your network can open up a world of possibilities for remote access and control. Whether you want to monitor your pis performance, access files, or run programs, understanding the basics of remote connectivity is essential.
Troubleshooting Common Issues
Even with careful planning, you may encounter some hurdles along the way. Here are some troubleshooting tips for common problems:
- Cannot Connect: Double-check your IP address, port forwarding rules, and DDNS configuration. Ensure the Raspberry Pi is powered on and connected to the internet. Test connectivity on your local network first.
- Port Forwarding Not Working: Make sure your router's firewall is not blocking the forwarded port. Also, ensure youve specified the correct internal IP address for your Raspberry Pi.
- SSH Connection Refused: Verify that SSH is enabled on your Raspberry Pi. Check your SSH server configuration and firewall rules.
- Dynamic DNS Not Updating: Confirm that your router supports DDNS and that you've entered your DDNS credentials correctly.
Access pi from outside network any port i'm currently having some trouble with my Raspberry Pi 3 b. I can't access pi any port from outside network, but except SSH port. In such cases, make sure that your router's firewall is not blocking the required ports. If you have a web site in pi, and if it can't be accessed from outside, then check the web server configuration and make sure it's running. Also, make sure that port 80 (for HTTP) or port 443 (for HTTPS) is forwarded in your router.
Remember to consult online resources like the Stack Exchange network, which consists of 183 Q&A communities including Stack Overflow, the largest, most trusted online community for developers to learn, share their knowledge, and build their careers. Additionally, the Raspberry Pi community is incredibly active, so you'll likely find answers to your questions in online forums.
The Path Forward
With a raspberry pi, this is no problem. Connecting to your Raspberry Pi from outside your network can open up a world of possibilities for remote access and control. From monitoring your pis performance, accessing files, or running programs, understanding the basics of remote connectivity is essential.
Master python on raspberry pi: Create, understand, and improve any python script for your raspberry pi. This means that you will understand everything about the Raspberry Pi, stop searching for help all the time, and finally enjoy completing your projects.
This tutorial will illustrate the process of accessing your raspberry pi from beyond your home or local network using the ngrok tool. Ngrok requires very little setup, just a few commands in the terminal, and works very reliably.
In this tutorial, we have shown you how to ssh into your raspberry pi from outside your network. Using a static IP address and using a dynamic DNS service. We also discussed the security implications of SSH and how to protect your Raspberry Pi from unauthorized access. These are the key takeaways from this tutorial:
The journey to accessing your Raspberry Pi remotely involves a combination of technical knowledge, careful planning, and a commitment to security. By understanding the principles of port forwarding, VPNs, and other methods, you can empower yourself to remotely access and control your Raspberry Pi from anywhere in the world.
The key is to experiment, learn from your mistakes, and always prioritize security. Whether you are a seasoned techie or a newcomer to the world of Raspberry Pi, the ability to connect to your device remotely is an invaluable skill, offering convenience, flexibility, and a wealth of new possibilities. By following these steps, you can unlock the full potential of your Raspberry Pi and take your projects to the next level.
Article Recommendations
- Brooke Monk Nude Videos Pics More Your Guide
- Burna Boys Marriage Is He Married Relationship Status More

Detail Author:
- Name : Dr. Dovie Purdy
- Username : donnell.cruickshank
- Email : marian.kirlin@gmail.com
- Birthdate : 1974-07-23
- Address : 12984 Carrie Turnpike Connellyborough, MI 53604
- Phone : 480-558-4637
- Company : Williamson, Heidenreich and Wyman
- Job : Loan Officer
- Bio : Sunt in optio doloribus suscipit ex eligendi debitis. Ut vel error voluptatem doloremque. Optio nihil dolores nisi ut eaque. Id sapiente repudiandae harum et et.
Socials
facebook:
- url : https://facebook.com/aaliyah6285
- username : aaliyah6285
- bio : Praesentium illum maiores doloribus laborum commodi qui.
- followers : 4493
- following : 184
twitter:
- url : https://twitter.com/aaliyah8459
- username : aaliyah8459
- bio : Fugiat quae at ratione corporis. Pariatur nihil velit repellendus. Quam aliquam nulla aut.
- followers : 849
- following : 2361
instagram:
- url : https://instagram.com/abartell
- username : abartell
- bio : Qui ut ut aut cumque. Et repellat et quis deserunt corrupti. Asperiores quia facere minus dolores.
- followers : 4636
- following : 1807
linkedin:
- url : https://linkedin.com/in/abartell
- username : abartell
- bio : Id sit enim expedita fuga ullam consequatur.
- followers : 1408
- following : 203
